Showing posts with label children. Show all posts

Tuesday, January 17, 2012

Crayon Quilts

About a year ago, I did a "Surprise Swap" with a group from the online quilting board, and received a really neat kit from my partner. I didn't take "in-progress" pics, but it's pretty simple. For this you need:

Crayons
a large piece of white muslin
any coloring page image of your choice
masking tape
wax paper and iron

Simply tape the coloring page to a hard surface for you to color on, and tape the muslin on top of the coloring page. You should be able to see the coloring page lines through the material. Now, take your crayons to the muslin and have fun coloring it to your hearts content. (The directions I have say to use a high quality muslin and good crayons, Crayola are best).  You will need to press down pretty firmly to color on the fabric, but it's okay because you're going to heat set the crayon when complete. I have the telescoping tower of Crayola crayons, and so I really played with shading and blending to make my image look as close to realistic as it could, but this is your project, so make it look however you want it to!

When you have finished coloring, take your muslin to the ironing board along with the wax paper.  Lay the wax paper on top of your ironing board and the colored image and press with high heat, no steam. Press, do not rub. Lift and press, lift and press, all over your colored image, moving the wax paper as needed to keep the crayon from melting onto your iron. The crayon will melt into the fabric, becoming heat set so that it will not wash out or rub off over time.


Now all that's left is to finish in a quilt. I love my Eeyore, and know that eventually we will be planning a nursery, so I am on the lookout for the Winnie the Pooh large coloring book so I can make 3 more panels: Pooh, Tigger, and Piglet. They will be completed as wall hangings to decorate a nursery.

I find the awesome thing about this project is that it is so personal.  There are literally thousands of coloring designs available through your local superstore and online, and if you are an artistic person, you can draw your own image to color. Plus, everyone has such individual opinions on design and color, 20 people could color this exact image of Eeyore and we would have 20 different Eeyores. 

Have fun creating!

Friday, April 8, 2011

Baby Gifts

Lately it seems that there is something in the drinking water around here because everyone I know is pregnant. In the last 6 months I have been to 6 baby showers, with one still to come. One of those showers was for twins. It seems that all I have seen on the sewing machine lately is baby things. And I know that long ago I said I would post pictures of the things I had made for my friends baby shower so today, I fulfill that promise.

As of now, I have a basic "kit" of gifts that I give to everyone. And I don't think its wrong to say (because I've had the girls tell me so) that everyone looks forward to receiving these packages.
First a set of burp cloths. I found these at Homemade by Jill and have played around with the pattern until I found a style I like best. She made both sides with flannel and put in a layer of batting, sewing  with a 5/8" seam allowance and then cut the fringe you see on the bottom of this stack. I made several of those but didn't like the way the batting bunched when  washed. I played around with sewing the batting down first, but that became too many steps for me. Eventually I eliminated the batting and changed one side to terry cloth. I sew them right sides together and leave an opening to turn them right side out and then stitch a coordinating thread around the edge at about 1/8", with a seam down the short middle to keep them together in the middle.

This is your basic tag blanket. I will not call them Taggies, since that has been patented, but the premise is the same. If you look on the left side, you will see that I try to add a fringe or satin/lace ruffle to mine to make them slightly different from the patented brands. I would consider posting a brief tutorial on these, but there a dozen tutorials on them if there is one.

And each baby gets a receiving blanket. These are the simplest thing in the world to make. I take one yard each of two complimentary or coordinating fabrics (one is ALWAYS a flannel, although sometimes I use two flannels). Trim the selvages but do not try to square the fabric. Just lay them right sides together and pin at least 2 sides so they won't move when you sew. I usually use a 1/4" seam allowance. After they are sewn together, I trim the excess, flip right side out and sew around the finished edge like the burp cloths, then sew a free hand "x" from corner to corner.

Now this alphabet book idea came from Obsessively Stitching. This book is not a standard part of my gifts, mostly because of the time involved and the difficulty in collecting the I-Spy fabrics to match the letters. (You wouldn't believe how hard it is to find a fabric for the letter "U"!)

I will not go into too much detail on the creation of these books because Care has already posted a wonderfully easy to follow tutorial on them.  I have tinkered with it myself and now make them with white muslin backgrounds (cheaper and makes the letters stand out a bit more I think), and finally figured out how she added the handle and closure to hers. I also toyed around and made a matching Counting and Shapes/Colors book for a friend, but will have to get her to take pictures for me. Super cute and worth the time involved to make.


I did get Steph's quilt back from the machine quilter and have the binding on, am this weekend sewing the ribbons to it and the label. Hopefully I will get pictures of it up afterward, and not keep you in suspense for another month. Thank you for your patience as I try to establish a routine for writing and posting!
Happy Crafting!

Monday, May 24, 2010

Feelie Box

After a wonderful hubby-free weekend, I feel like I have accomplished something! I made a list Friday evening before the boys left. Fifteen tasks and crafts I have been needing to work on. By bedtime last night, I had completed all but 4! Due to a strong sense of duty to the house, however, I did not get to work on many craft projects. I DID clean the house, and finish unpacking and organize the craft room to my particulars. Pictures to come later. Now, I can work on crafts and ideas in peace. My surroundings are calm and inspiring. I love it!

I was able to make a feelie box for Tigger to play with. Supplies needed:
--an empty Kleenex box (preferably the small square size)
--fabric scraps (the more textured the better)
--hot glue gun and glue sticks

Open the box along one of the sides. I just popped open the glued seams. Measure and make a template for the inside of the sides of the box. Use the template to cut your fabric squares.


The square for the bottom of the box will probably need to be cut smaller in length. I found it was easier to start with the side directly across from the open side of my box. Of course, I feel that way because I would rather get the hardest part out of the way first. Now, take a lesson from me, because it had been so long since I used hot glue, I forgot how quickly it cools and dries. With my first fabric scrap, I applied the glue to the entire square before trying to get it to adhere to the box. Abysmal failure. As I'm sure those if you who are very familiar with hot glue know what happened next. Bumpy lines of glue added to the texture of my square, just before it let go of the box, and fell out. Silently taunting me.


At which point I remembered to glue slowly. So I began again, starting with the corner of each square, applying the corner to the box, and moving forward, inches at a time. Now, while this sounds tedious, remember I suggested using the small kleenex box. This is why. The larger your box, the larger your pieces of fabric, therefore the longer it will take you to apply the hot glue.


Once all four of the complete sides have been glued, what remains is the side you opened the box with. Using the same slow-going technique, begin gluing your fabric to one flap, making sure it is facing the correct way to fold into the box. When it comes time to glue the other half of the fabric, apply the glue to the far edge of the material, stick your hand in the dispenser opening and press the second flap down onto the material, which you have supported from underneath.


From here, it's simple to complete. Glue the remaining two flaps down as they originally came up from the box. You can leave the box decorated as a kleenex box, or cover the box with colored contact paper. I made sure to reinforce the seams of the box because Tigger is a curious child who tries to stick his fingers into any opening and pull. So, I try to discourage the destruction of a project I have made.
The good news? I took the box to work today, put it on the floor, and he immediately went for it. And stuck his whole hand in the opening as designed. Then rewarded me with the most beautiful smile as he felt what was inside. I turned the box around on his hand, and let him feel each texture. We talked about the smooth, silky, rough, bumpy textures in the box. And then he dropped the box and crawled away, content for the moment and having discovered a "new" toy on the other side of the room he hasn't seen since Friday! Later, I saw him playing with the box by himself, hands inside.....corner of box in his mouth. Oh, well. Such is the play of infants!

Sunday, May 16, 2010

'Tude and Tigger

I've mentioned before that I take care of a 10 month old daily, and one or two days a week, I also get a three-year old and his 10 month old brother. 'Tude is the 3 year old (guess why!) and Tigger is my every-day, bouncy baby. For security reasons, I will withhold their actual names.

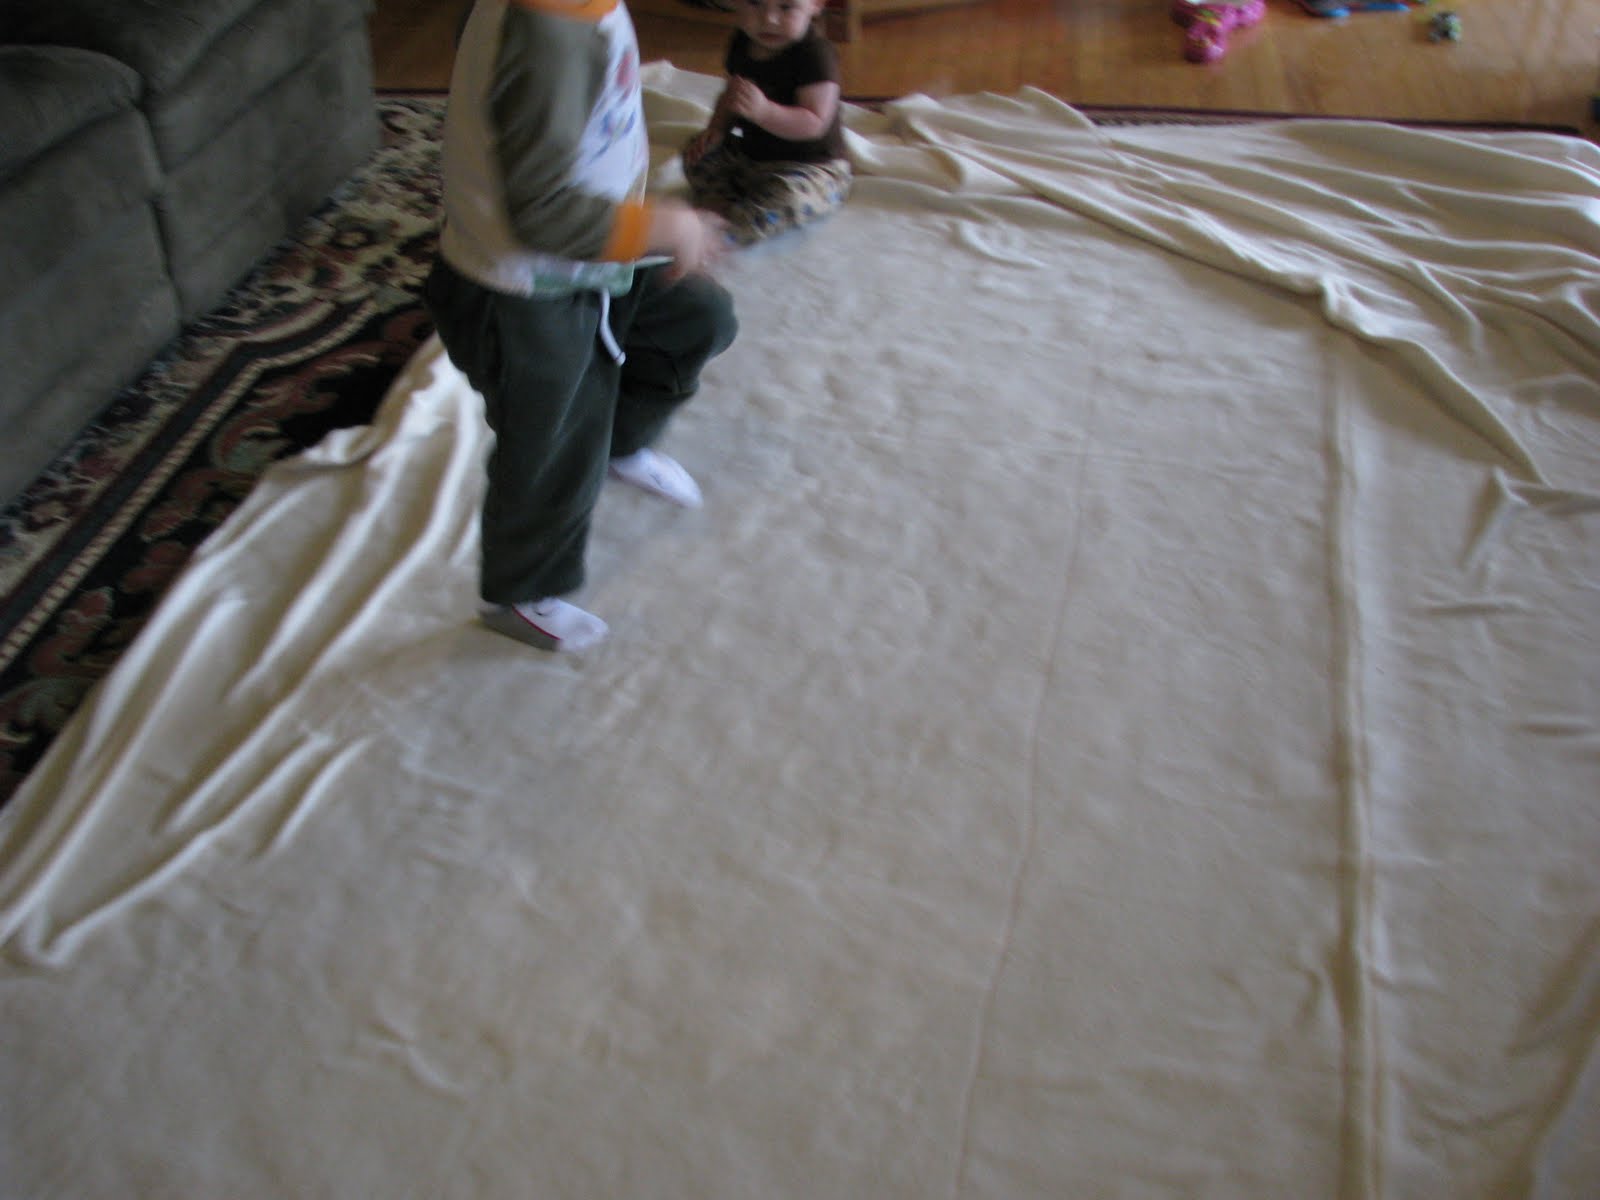
Early last week, while I was working on my quilting design wall (a 6 yard piece of fleece, cut into 2 two-yard pieces, sewn together to create a 110" x 120" neutral colored backing to hold quilt blocks for placement, allowing me to visualize the finished product without Pepe running through the mess), 'Tude's monther sent a text to ask if I could watch him for a few hours while she ran some errands. Of course I could. When she dropped him off, I had the fleece spread out on the floor measuring the grid I'm sewing into it. I started to roll/fold it up, and 'Tude began walking on it. I "suggested" he take his shoes off, and feel it. So we ended up laying on it, stroking the fabric and talking about how it felt.

I can't remember why, but I ended up putting in a cd of classical music for us to dance to. We listened to the music, talked about what it sounded like (bouncy, light, heavy, loud, soft, etc) and what kind of animal might move that way. Then, we pretended to be that animal while the song played. As we danced, 'Tude made the comment "Stay on the dancing blanket!" So, we danced on the "blanket". Now, I need to make a "dancing blanket" for us, since this particular one already has a purpose. (Tigger is the teeny one you see in the background of the pic - he didn't pretend, but while we were being tigers, he was our dinner, and we "gobbled" his neck and belly, to his eternal delight)

'Tude also does not enjoy eating. No, it's not that he won't eat healthy foods, he just won't eat food. Period. His diet consists mainly of liquid nutritional supplements. I have made it my own personal challenge to get him to eat food, healthy or not, but healthy preferably. And since with my b'day money I finally got my food processor, this has become much easier. Last week, I made Sneaky Chef chocalte cupcakes (I called them muffins) with spinach and blueberry puree. Delicious, and he loved them. Today, I made the orange puree and the white puree.

The orange puree is made with carrots and sweet potatoes. You can add this to Grilled Cheese Muffins, canned Spagetti-os, Taco Soup, or added to ketchup or barbeque sauce to make them a bit healthier. Yum. The white puree is peeled zucchini and steamed cauliflower. In the future, I will make white puree when I make green puree (spinach, broccoli, and peas) because I hated throwing out the zucchini peels! The white puree can be added to Complete Corn Muffins, canned Spagetti-os, mashed potatoes, or added to mustard or mayonnaise. Basically, I made full recipes of each, because I'm planning to make foods to get the 3 year old to eat, and add them to my own foods so that DH and I can eat a bit healthier too. Yummy.

Now, before anyone says what I used to think: adding these purees really is worth it. My original opinion when Sneaky Chef came out was that adding a 1/4 cup here or there wasn't going to really give the kids the nutrients they need. But think about this. For children up to the age of 3-5, the serving size of vegetables is 2-3 ounces. A quarter cup = 2 ounces. Most of the recipes call for 3/4 cup. If most of the foods you serve your kids have sneaky ingredients in them, by the end of the day, 3-5 year-olds have eaten their daily requirement of veggies. And they never even knew it! The best part is, the food is really good. So good she even wrote a book for sneaking food into your own "adult" meals. And I have all of her books. Guess what DH and I will be eating for months to come...

Wednesday, April 21, 2010

Preschool Activities

To my loyal friends who continue to check to see if I've posted, I love you for your persistence! I am so excited about moving (which may happen earlier than planned, YAY!) that we're about halfway through with the packing. Which unfortunately means I haven't even been able to think about crafts, much less work on any. Okay, that's a lie. I think about crafts all day long. I just have so many other things going on right now that I can't focus!


But today, I got to work on some projects for and with the 3 year old I take care of on Wednesdays. I use a book series titled "Active Learning for..." insert age group. It has fantastic ideas for language, physical development, creative activites and "the world around you" - nature, senses, numbers, size, shape color. There are 6 books in the series, infants through fives, and although technically designed for childcare settings, still works well for the SAHM or nanny. So we made some discovery bottles, and a bird feeder today. (Blackbirds are building a nest in the gutter outside our door, so we'll eventually have babies!)


The bird feeder was super simple. **if allergic to peanuts, DO NOT TRY THIS AT HOME*** (I can say this with authority, because I ... am alergic to peanuts, but never had any problem touching them, but that has apparently changed! I broke out in a rash on both arms and had to take a Benedryl (the kids are just wishing I had given in the urge to stretch out on the floor and snore today!)


Step 1: Mix about a cup of peanut butter with approx. 1/2 cup cornmeal. Make a thicker paste, basically. Then add in bird seed. If you add too much, don't panic. Either spread the extra out on the ground around where you hang the feeder, to entice the birds, or just add more peanut butter.


Step 2: Mush together. Yup. Just like playing in the mud, or making cookies. If working with a 3 year old, have plenty of paper towels on hand because -eew, my hands are sticky- which they wipe off, then stick back in the bowl.


Step 3: Scoop mixture into an empty onion mesh bag. The birds can pick through the bag and won't choke on it. Tie bag with clothesline, and hang anywhere you choose.

Easy-peasy.


The second activity seemed pretty easy too, but turned out not so much. Maybe I did something wrong.

Discovery Bottle: Color Mixing


Step 1: Empty several small soda bottles. (See, easy! Just drink your favorite soda!)


Step 2: Locate and purchase powdered tempera paint (choose a primary color for this,or you defeat the purpose). Yes, they still make it. You just have to search high and low for it. I found mine at HobbyLobby, with the regular painting supplies, not the children's painting supplies.


Step 3: Mix powdered tempera into vegetable oil. Now maybe this is where mine went wrong. I only had Canola oil (I know, not as good for you, but Good). The family only had Canola oil (see, I'm not the only one!). So Canola oil is what I used. My powder didn't really mix very well into the oil. It colored the oil a bit, but for the most part, the paint settled to the bottom of the bowl.


Step 4: Mix a primary color of food coloring into plain, unfiltered water (hey, no need wasting the filter on a toy!) Make sure your water color is one of the other two primary colors.


Step 5: Now mix equal portions colored oil and colored water into empty soda bottle. I use the 12oz version, because I also use these with infants, who have small hands! But the 16 or 20oz bottles would work just as well. I don't think I would recommend larger, just because of the expense of the oil you're using. And when mixing, it's better to put the water in first, then the oil.

If a child is helping you, I suggest using a funnel and pour spout, because otherwise...catastrophe. 'Tude (as his grandma calls him) "helped" me pour the liquids into the bottle, which I'm sure you know means I poured and he touched the cup.


Step 6: Glue the lid onto the bottle. This is especially important if these bottles will a) be used inside or b) you have small children who put everything into their mouths. My favortite glue for all children's projects like this is Gorilla Glue, because it expands and seals completely.


Now, Shake! The colors blend when shaken, but settle back out to their original colors, since oil and water don't mix. However, mine are not settling back out so well after a few shakes. The water is slowly turning the mixed color, and the oil stays yellow (my primary choice)


In the midst of all this, I am sorta working on a UFO. I created a chart for the parents, so they could see what activites we are doing each week, with the directions to do it themselves if they choose. And as you see, that requires the activities be transferred from the book to notecards, which is taking forever. And that is what I've been working on while the baby sleeps these days, rather than the fun of crafts. But it is fun, because I get excited about using these ideas, and helping 'Tude and Tigger grow and learn. Nothing is as much fun as watching the little light bulb go off when they figure something new out!


Monday, March 29, 2010

Infant Blanket

I had the day off, and instead of working on any UFOs (bad me! slap on the wrist!), I loafed around, went shopping with a friend, then took a Benedryl induced nap (darned Bradford Pear trees!) But that's okay, because who doesn't need one of those days every now and then. It was very nice.


So, today I thought I'd show you the project that inspired me to quilt and craft again. I take care of an 8 month old baby during the week. I've been looking through a book of activities to help enrich his playtime, and kept seeing references to texture blankets, and quilts with bright patterns. This was 3 months ago, so "Tigger" as I will call him here, was not crawling yet, and we were still having plenty of tummy-time. And I remembered that a few years back, I had made texture squares for the day care I worked at. Burlap, satin, pleather, suede, chenille, and a fluffy stuff that looks like I skinned a Smurf. And I still had more than half of what I purchased for those blocks.


I decided that I could make a blanket with both textures and patterns, and immediately headed to Wal-Mart to find some. I only purchased 1/4 yard cuts, because I knew I wasn't going to make many squares, and as I was picking out patterns, I also realized I had a fabric stash I could raid. I ended up with only 5 pattern fabrics from Wal-Mart, then added 10 more from my stash. My plan was to create one, two-sided blanket for playtime: Side A was patterns and colors, Side B was textures. I cut 8 1/2 inch squares of the patterns, so that with a 1/4 inch seam, I would have 8 inch blocks. I then sewed my textures together in larger chunks, and arranged them in a more haphazard placement so that everywhere the baby touched, he would feel something new. Since trying to do any kind of quilting would be impossible, I tied the quilt in the middle of every other square. And I used satin, with iron-on interfacing for stability, for the binding.

And it turned out awesome! I remembered how much fun it was to piece together the quilt tops, and how satisfying it is to sew on the binding. And then I wanted to do more, and then I realized I had plenty of things I could finish, and now here I am. Letting everyone know that UFOs do not need to remain unfinished! They can be completed, just as I completed this infant quilt. Which Tigger loves. That blue Smurf fur is everyone's favorite, though!