Showing posts with label completed. Show all posts

Wednesday, February 15, 2012

Happy Valentine's Day (and a quilt, too)!

Yes, I know that it's actually the 15th and Valentine's Day was yesterday, but I awoke this am at 5:40 so I could make my hubby the biscuits and chocolate gravy I wanted to make him yesterday (alas, I was without enough Bisquick). The biscuits are done, the chocolate gravy has been thoroughly enjoyed, and he has left for work. So now, I am wide awake at least an hour before I normally would be. Unless substituting, of course.

Sitting and playing around on ye ole Facebook, I saw a post from my cousin about her new babies, and said to myself, "Self, you have not yet showed the completed I-spy quilts for the twins!" Well, I can remedy that!

Two matching quilts, side by side. 88 different I-spy fabrics in each quilt, for a grand total of 176 different I-spy squares! (I have become obsessed with I-spies. That's what happens when you start swapping!)

A little bit closer detail. I used the Disappearing Nine-Patch tutorial from Obsessively Stitching, but I'm sure there are others out there. Be forewarned. If you start following Care on Obsessively Stitching, you may become as obsessed with I-spies as she and some of her followers - like me!- have become!

Here you can see the quilting detail performed by my fabulous machine quilter Jean, as well as the AWESOME striped fabric I found to make the binding with. I loved both of my binding fabrics so much, I went ahead and bought a full yard of each to make binding out of, so we'll be seeing these bindings again soon!

You can't see the quilting detail very easily in the pictures I got of the blue and orange quilt, but it is a cute half moon and stars pattern.

The newly arrived twins live about 7 hours from me, so unfortunately there are no pictures of the twins enjoying the quilts yet. But rest assured, the babies are healthy and adorable!

Tuesday, January 17, 2012

Crayon Quilts

About a year ago, I did a "Surprise Swap" with a group from the online quilting board, and received a really neat kit from my partner. I didn't take "in-progress" pics, but it's pretty simple. For this you need:

Crayons
a large piece of white muslin
any coloring page image of your choice
masking tape
wax paper and iron

Simply tape the coloring page to a hard surface for you to color on, and tape the muslin on top of the coloring page. You should be able to see the coloring page lines through the material. Now, take your crayons to the muslin and have fun coloring it to your hearts content. (The directions I have say to use a high quality muslin and good crayons, Crayola are best).  You will need to press down pretty firmly to color on the fabric, but it's okay because you're going to heat set the crayon when complete. I have the telescoping tower of Crayola crayons, and so I really played with shading and blending to make my image look as close to realistic as it could, but this is your project, so make it look however you want it to!

When you have finished coloring, take your muslin to the ironing board along with the wax paper.  Lay the wax paper on top of your ironing board and the colored image and press with high heat, no steam. Press, do not rub. Lift and press, lift and press, all over your colored image, moving the wax paper as needed to keep the crayon from melting onto your iron. The crayon will melt into the fabric, becoming heat set so that it will not wash out or rub off over time.


Now all that's left is to finish in a quilt. I love my Eeyore, and know that eventually we will be planning a nursery, so I am on the lookout for the Winnie the Pooh large coloring book so I can make 3 more panels: Pooh, Tigger, and Piglet. They will be completed as wall hangings to decorate a nursery.

I find the awesome thing about this project is that it is so personal.  There are literally thousands of coloring designs available through your local superstore and online, and if you are an artistic person, you can draw your own image to color. Plus, everyone has such individual opinions on design and color, 20 people could color this exact image of Eeyore and we would have 20 different Eeyores. 

Have fun creating!

Wednesday, January 4, 2012

Completed: Teapot Quilt

A few weeks after I began working on my husband's t-shirt quilt, I finished the hand-quilting on the very first quilt I pieced. Almost 10 years later, the small wall hanging was finally finished. I made my continuous bias binding, sat down in front of Netflix and began sewing. Four hours later, the quilt was finished.


Applique is still not one of my favorite techniques. But I do like this quilt. Looking at this picture, I realize it is not 100% complete. It is lacking 2 things: the hanging sleeve so it can actually hang on the wall, and the 13 buttons I dug out of my mom's sewing box for the knobs on the teapot lids (I didn't want to try to applique the tiny circles for the lids, thought I would make a small substitution.) Dang it! Although it is not Technically complete, I am still marking it as complete. Those two finishing touches will not take long, and now that I see them, I can add them to my weekend to-dos.

One less UFO in my world!

Monday, January 2, 2012

The DH's Christmas Quilt

My husband loves t-shirts. He also hates throwing things away. The end result? Piles of threadbare, hole-y, t-shirts with black armpits. (We also have piles of socks and boxers that fit this description, but that's for another battle, another post!) So two years ago, I began sneaking t-shirts out of the laundry. At first, it was one shirt every month or so, but last February, I amped up the sneaking and soon had a stack of his favorite t-shirts. And I knew just what I was going to do with them!

In July, I began slicing and dicing t-shirts. I also spent hours planning. In August, I began sewing. In September I became good friends with my seam ripper. During the month of October, I took a break. Then in November I panicked! Christmas was right around the corner! I wasn't finished. This realization was followed by a marathon sewing day. Then we were off to a local machine quilter. Have you figured it out yet?

Yup!! A t-shirt quilt was born. In order to get the layout correct, I had to add one of my own t-shirts (the Snoopy/rainbow) and bought one from the local Goodwill to fit the last remaing empty space (the game controller in the lower middle). Aside from that, this is 28 of his favorite t-shirts from his college and high school years. During the whole process, he realized only 3 of them were missing. All other "concerns" about missing t-shirts were smoothly deflected by my DENYING the existence of any missing shirts!

He loves it. It has replaced our tattered couch blanket, and all fuzzies love it. The big cat actually sat in the middle of the quilt the entire 12.5 hours it took me to sew the binding. DH actually had me put it on the bed Christmas evening, and we slept under two blankets that night. I am sitting under it even now. Soon I hope to finish hand-quilting my high school t-shirt quilt and begin planning my college t-shirt quilt. We will have plenty of warm, comforting quilts to remind us of days past, not stacks of t-shirts we can no longer wear cluttering up our closests!

Friday, July 1, 2011

Baby Quilt

Finally as promised......Stephanie's baby quilt!! With pics!!

Stats on this quilt:
begun: September 2010
baby shower for Steph: October 10, 2010
baby born: January 1, 2011
quilt completed: March 2011
quilt delivered: the next day!!

Eesh! The long and short of it is, I was in no way prepared to start machine quilting on a baby quilt, even it it was only 54"x54". And that discouraged me most of all. Every time I pulled it out to try again, it just aggravated me to no end until I was ready to pull out the rotary cutter and slice it up for scraps! And, well, that wasn't really an option, now was it? So I hired it out. Found someone locally who was comfortable finishing what I had started, no matter how badly it looked, and she had it completed in less than 3 weeks. Phew! What a relief.

Without any further ado....


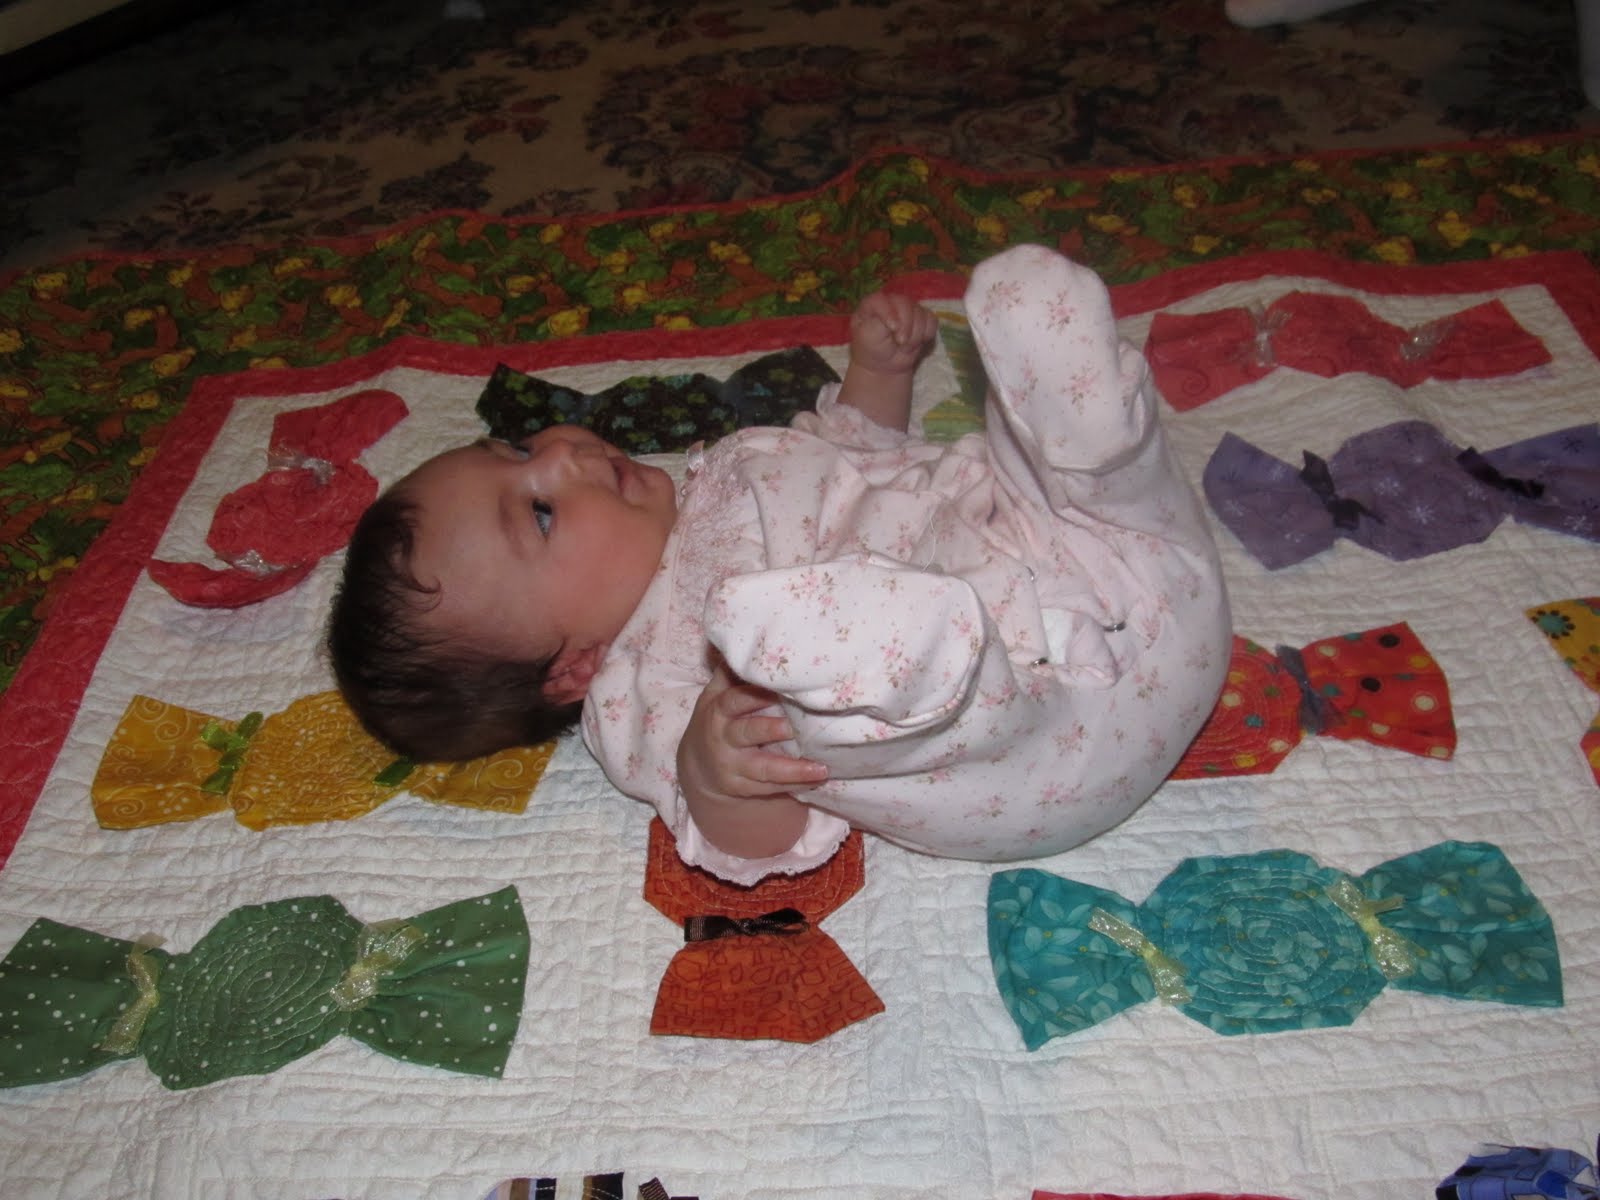
 Bright, bold, NOT baby-ish prints, surrounded by a border of monkeys.  Looking like the cutest of candy wrappers.

Look at how little she looks on the big blanket....oh, wait, she IS little!

I think she likes it. What do you think?


Wednesday, June 29, 2011

Felt Food Extreme

Hello! Lots of new stuff going on around here since I've been gone. I am just about done with my nanny job and taking an online class so that maybe, just maybe I can get a teaching job in the near future. We have not one, but two cats in the house, both rescued from the cruel world which abandons even 6 week-old babies (that would be the newest one, currently crying from her quarantine room. Only 4 more days of this!) And of course, new crafts and ideas sprouting everyday. Like for instance the Christmas present idea I had for my husband! Have to work on that when he's on night shift, and since I won't be able to complete it in front of him, will have to send it off for completion, so that's why I'm 6 months ahead.

But today I thought I'd try to complete an update to the felt food gifts I was making for my friend's 3 year old (well, she's 3 now). I took her the last box a few months ago and she had the biggest kick out of checking them all out. Then she showed me her new play kitchen set complete with all the great food. I can tell the food pieces will never be lonely, at least not for a long while.

Again, one super stuffed, medium sized "if it fits, it ships" boxes from the post office.

Breakfast: eggs in the carton, sunny-side up eggs (oh no! Her link isn't working! Hopefully I can get this remedied...these were SO not something I could have come up with on my own!), and bacon.

Halved lemons, oranges, and kiwi. What you can't see is that they have velcro centers so they can be cut apart! Oh, and the orange sort-of unbalanced the pic, so they are not shown.

"Tot-tarts", AKA toaster pastries.

Chocolate glazed doughnuts from Krispy Kreme. Because if you're going to splurge on a doughnut, it's got to be only the best!

This box also had a few extras from sets I hadn't finished with the previous set.

Um...oops. I made a LOT of food!! Didn't quite realize how much until I saw it all together.

She's quite the Southern cook! Who knows, maybe a Paula Deen in the making!


Some of these I made from others tutorials, and if so, you can find them by clicking on the link. If no link, I created my own patterns by seeing what others had done and visualizing it myself. I would like to swear that I will eventually get tutorials up on those, but lets be realistic for a while, ok? Anyway, I'll be making more soon for another friend whose daughter will be 2 this year, so that can be a goal. I will TRY to make tutorials. Just can't swear to it right now!

Friday, April 8, 2011

Baby Gifts

Lately it seems that there is something in the drinking water around here because everyone I know is pregnant. In the last 6 months I have been to 6 baby showers, with one still to come. One of those showers was for twins. It seems that all I have seen on the sewing machine lately is baby things. And I know that long ago I said I would post pictures of the things I had made for my friends baby shower so today, I fulfill that promise.

As of now, I have a basic "kit" of gifts that I give to everyone. And I don't think its wrong to say (because I've had the girls tell me so) that everyone looks forward to receiving these packages.
First a set of burp cloths. I found these at Homemade by Jill and have played around with the pattern until I found a style I like best. She made both sides with flannel and put in a layer of batting, sewing  with a 5/8" seam allowance and then cut the fringe you see on the bottom of this stack. I made several of those but didn't like the way the batting bunched when  washed. I played around with sewing the batting down first, but that became too many steps for me. Eventually I eliminated the batting and changed one side to terry cloth. I sew them right sides together and leave an opening to turn them right side out and then stitch a coordinating thread around the edge at about 1/8", with a seam down the short middle to keep them together in the middle.

This is your basic tag blanket. I will not call them Taggies, since that has been patented, but the premise is the same. If you look on the left side, you will see that I try to add a fringe or satin/lace ruffle to mine to make them slightly different from the patented brands. I would consider posting a brief tutorial on these, but there a dozen tutorials on them if there is one.

And each baby gets a receiving blanket. These are the simplest thing in the world to make. I take one yard each of two complimentary or coordinating fabrics (one is ALWAYS a flannel, although sometimes I use two flannels). Trim the selvages but do not try to square the fabric. Just lay them right sides together and pin at least 2 sides so they won't move when you sew. I usually use a 1/4" seam allowance. After they are sewn together, I trim the excess, flip right side out and sew around the finished edge like the burp cloths, then sew a free hand "x" from corner to corner.

Now this alphabet book idea came from Obsessively Stitching. This book is not a standard part of my gifts, mostly because of the time involved and the difficulty in collecting the I-Spy fabrics to match the letters. (You wouldn't believe how hard it is to find a fabric for the letter "U"!)

I will not go into too much detail on the creation of these books because Care has already posted a wonderfully easy to follow tutorial on them.  I have tinkered with it myself and now make them with white muslin backgrounds (cheaper and makes the letters stand out a bit more I think), and finally figured out how she added the handle and closure to hers. I also toyed around and made a matching Counting and Shapes/Colors book for a friend, but will have to get her to take pictures for me. Super cute and worth the time involved to make.


I did get Steph's quilt back from the machine quilter and have the binding on, am this weekend sewing the ribbons to it and the label. Hopefully I will get pictures of it up afterward, and not keep you in suspense for another month. Thank you for your patience as I try to establish a routine for writing and posting!
Happy Crafting!

Wednesday, November 3, 2010

Felt Food Mania

Okay. So I promised to do more updating and here I am. It occurred to me that I posted a while back that I had finished my first box load of felt food and mailed it off, or at least I mentioned it in the Finished column.  Yet I never posted any pictures or links to the inspiration and patterns that helped me create them.  (Many of them you will see were found at Helping Little Hands' Felt Food Cook-Along) Prepare for a bunch of links!
This box is the size of one of those medium Priority Mail boxes. And just look at what all fit into it!!

 Felt cookies from this website. No patterns were used, it's really simple. Just two cream colored felt pieces layered together with a fun frosting, sprinkled. The chocolate chip cookies were inspired by these blueberry muffins.  I loved her idea that the blueberries are not always on top, and since chocolate chips usually look the same in the cookies, I duplicated it.  After sewing the random curly-q's to the wrong sides, I sewed the right sides together, leaving a space to flip them through.  Now, I also think that they look better a bit thicker, so I used scrap batting from quilting projects to stuff them before hand sewing the cookies closed.  K says her little girl is in love with the cookies right now. 

I love these tomatoes.  I'll show you the website and pattern I found them on, but when you see it, you'll kick yourself for not seeing how simple they are! It's nothing more than a large circle gathered and stuffed.  Cut out a leafy top, sew it on and you're done! And the tomato slices were just as easy, you'll see!

I have been wracking my brain and wearing out my search engine, but I cannot for the life of me think of where I saw an idea for the hamburger and buns.  At the bare minimum, I probably saw one in a Flickr pool of felt food and was inspired to create my own pattern based out of the creation of other foods, like the sliced bread (below).  The only thing that makes the burgers cuter than a bug to me is the grill marks: black embroidery thread stitched in straight lines. I don't know about you, but my hubby never manages to get the perfect cross-hatch on a burger.

These are some of my favorite pieces, and until K's little girl got the cookies, she too was in love with the first slice of bread I made for her.  Rather than create 3 different links, I'm just going to make one, back to the Felt Food Cook-Along, because that's where all but the lunch meat came from.  The lunch meat is little more than a piece of pink felt (or 2 if you want more thickness or stability), cut with pinking shears and machine stitched around the edge for a bit of detail.  The rest of the food in the picture is the Sliced Bread, the Chicken Pieces/Chicken Nuggets in the Felt Fajitas, and The Amazing Changing Felt Pizza Crust/Tortilla. 


These bananas and corn-cobs were super fun to create! I think I need a set just to keep here at the house for me to play with!  When I make them again, I want to find a way to put magnets inside the individual pieces. When K's daughter played with them, she had difficulty getting the pieces back together.  Securing the magnets so that they won't be a swallowing/choking hazard isn't actually the issue, I have that figured out.  It's finding cheap magnets that aren't cost-prohibitive!


The carrots were super cute when finished, and I kinda went overboard cutting out orange felt, and I think I made 20-ish carrots!  The strawberries, while cute, aggravated me.  I made most of them too small, which makes them choking hazards, so I had to send her only a few, with the promise to make more, larger ones, soon.  And these oranges....I'm in love. (Here's the link for the peel)  They were actually the first food pieces I made, and they clinched it....I am a FELT FOOD MANIAC!!

Tuesday, September 28, 2010

"I Finished It" Update

I know I haven't posted in more than a month.  But I have been working.  And so I did update the completed projects sidebar, even though I have not yet detailed those projects.  It just looked so sad sitting there with a short list of completed projects when I know I've done more!  So, over the next few days, I will catch you all up on my progress.  The baby shower for Stephanie is Oct 9, and I must not allow myself to give any more gift ideas away before they have been gifted!  So I wil use the next two weeks to catch you(and me!) up. 

Happy crafting!

The Height of Too Muchery

Baby shoes.  Have you ever thought about it?  They are just too-much!! They remind you of little tiny baby feet, and then you just wanna gobble them up!  So my bf Steph is having a baby girl. I have been cutting and sewing fabric like a madman (mad hatter?) for weeks, and now am finally getting a chance to put the pics on the blog.  Okay, maybe that's not all the truth.  The other piece is that dh is taking an online class and I'm lucky to be at the computer long enough to load pictures and type up my story here!  And with a job, a house to keep somewhat clean, and a dog, well, I'm just lucky to have time period!

But anyway, back to the point of tonight's post....BABY SHOES!

Now, Steph and her hubby are not your typical suburban parents-to-be.  They are not goth, or punk, or preppy.   They are one of those couples who have seriously been together for 15 years, married for 6, and they met and started dating at age 15.  Yup.  They march to the beat of their own drummer.  And they pull it off perfectly.  For example, someone gave them an adorable onesie.  Green short sleeves, with long brown sleeves underneath. It has a guitar in solid brown, no other colors, on the front.  She is dying to find some brown leggings and a brown tutu to dress Mia up in, size 6-9 months. Too cute. 


Well, her dh loves his Vans skateboard shoes.  And I found, finally, a small enough black and white checkerboard print to make some shoes for their imminent arrival (January).  I had a pattern from this website chosen to make semi-Van-like shoes from, and then I went into Hobby Lobby.  Where the awesome (evil!!!) saleslady pointed me to the Simplicity patterns that were on sale, for 99 cents!!!! I went a teensie bit overboard and bought 6, but the best find that day was a baby shoe pattern.  In which I found a perfect look-a-like for the skateboard shoes.....TA-DA!!!

I mean, really, does it get much cuter than this?  Sorry the side view is blurry, it's the best of the side views!  I have been squealing and giggling in such high-pitches that my own dh is getting a bit worried!!  I cannot wait to give these to the dad-to-be! Steph knows about them, and is just as excited (no, she hasn't seen them) but she says since they were made with him in mind, they should go to him. And I agree.  But this....
is the height of too-muchery.

Monday, August 16, 2010

Maternity Skirt

I know I said I would do this yesterday, but seriously, if you had seen the list of things I accomplished yesterday, and knew what time I finally came home, you would totally understand.  When you live in a small town 1 hour away from the nearest large city, you plan your trips and then go.  Hit every store and place possible, visit one or two friends while there, and listen to 3 cds of the cd book.  Good times.

So anyway.  S is finally pregnant after trying for nearly three years.  October would have been the official 3 year mark.  She's 18 weeks along and just found out last week that IT'S A GIRL!!! I'm so excited.  There are so many adorable things to make for girls.  Boys have cute things too, don't get me wrong, but the preponderance of ideas is shifted to the girls side.  (BTW, there is NO question this baby is a girl, when it came time for the tech to "look at the plumbing" she obligingly rolled over, flipped her legs in the "air" to proclaim, LOOK ma, no penis!!)  S's sister-in-law's sister just had a baby last December and went from a size 12 to an 8 after the birth (no fair).  So she passed some new jeans on to S that she had never worn.  But now she has baby belly, and needed maternity bands.

In swoops Homemade by Jill's Jeans to Maternity Skirt Refashion.  Very simple, easy to follow tutorial.
Take regular ol' normal jeans, preferably wide leg, as I discovered these were originally skinny oops.

Remove the waistband and take out the inner leg seams.  (No pic, sorry.  Was listening to a book-on-cd while working this portion of the project, so sorta got distracted)

Make sure your tension is correct on your sewing machine for jeans.  This WILL take a while.  Unless you've been hemming jeans recently and know the correct tension off the top of your head, which I don't. It's best to practice the tension stitches on a piece of the exact jean you will be sewing, so I cut off a portion of the leg (hey, it's gonna be a skirt, so I was gonna cut the legs off anyway, right?)  My sample stitches ended up looking like this masterpiece of hot mess.  Finally got it right though! (Save this scrap piece.  You can use it as stuffing for large stuffed pieces, like dog pillows/toys)

Sew inner legs together.  (No pic, same excuse as before)

Begin following directions for the maternity band. Know that S wears a size medium top, and since Jill says an old shirt that has shrunk in the wash, use one of my own shirts to measure the jersey material I got in lieu of t-shirts since it was actually cheaper.  Take skirt and band to S to have her try it on before finishing it.

Catastrophe.  The skirt fits.  Thank goodness.  But the maternity band will NOT go past her thighs.  Not because they are huge, they're not, but because either my shirt has really shrunk, or I messed up somewhere.  Except now I have no more jersey material, and have to go to Wally world to buy a t-shirt.  Like I should have done in the first place. 

This time the band fits.  It fits me, so it will fit her.  (my legs are a bit bigger than hers, so that's a good judge)

Now time to bite off more than I can reasonably chew at one time.  A few weeks ago, Crafterhours held a skirt contest, and the winning straight skirt was so adorable I knew I had to do the same thing to this skirt refashion.  Of course, I don't have an awesome sheet like that in my house, so off I traipse to the Goodwill.  Found a sheet that works just as well.  Cut all the flowers out, iron the fusible stuff to them, then iron them on to the skirt in a nice arrangement.  (Again, no pic.  What was I thinking!?!?)

Begin zig-zagging around all the pretty flowers.  Some more.  And some more.   And crap.....I ran out of thread.  Off to the store....my color has been discontinued.  Did you know they discontinued sewing thread colors!?!?! I certainly did not.  Try desperately to match the color, but no.  Nothing available is even close to the same shade.  Give up, buy two spools of a thread that will work.  Begin again.   I lost track of how many times I had to wind the bobbin.  Two nights later.....ta da!!


I did not use the sparkly thread.  Wanted to. Just not sure how.  As in, not sure if I should use the sparkly in the bobbin as well, larger/smaller stitches, etc.  Plus, the skirt is super cute as is. 

Now, yes.  I do have a pic of S trying on her new skirt.  She loves it, by the way.  It's just on my phone.  Which I left at work today.  An hour away from home.  And when did I discover I had left my phone?  You got it! When I pulled in front of my house!!! S says the band is a bit loose right now, but I'm okay with that.  First, this is the very first time I have ever sewn something like this without a pattern.  Secondly, she's only 18 weeks.  She still has at least 2-3 months worth of growing to wear this skirt in, if not four here in Tennessee.  That band should be nice and snug by October.  Baby due in January. By then (Oct) I should have the regular jeans refashioned, no cutesy flowers. 

Saturday, August 14, 2010

Another Refashioned T-shirt

Okay.  Sorry it's been so long, once again.  Again I say, I have continued to work on projects, but the problem is that I continue to begin new ones, and so increase the list and the amount of work needed to complete them!  I have decided a new method is in order, still working out the kinks....it will involve more timely deadlines, supposedly.....

So, for tonight, I attended a lovely catered dinner at our new church, just for the ladies. It was beautiful. Each table was sponsored and decorated by one or two women. Our table was 80s themed.  Side ponytails, crimped hair, Pixy Stix and Smarties, and LOTS of awesome memorabilia.  Well, I don't really have any truly 80s themed clothes (okay, maybe, but this allowed me to finish something, so go with it!).  I was getting ready to finish working on my friend's maternity skirt, which I will hopefully publish tomorrow, when I remembered I had a t-shirt incompletely-refashioned from back in April that might work out for 80s. 

I can't find the original pic of the shirt before I played with it, but it was a pill-y stretched out THIN shirt that I had grown tired of wearing because I always needed to wear a cami under it.  An in the 100+ degree weather we've had the last few MONTHS, an extra layer of anything, even thin cami material is one too many!  I dug through my fabric stash and found some prints I would probably never use any other way and cut hearts out of them. I suppose you could do different sizes, but I made mine all the same size.  Ironed some double-sided interfacing on them, then ironed them onto the shirt.  And there the shirt sat for months.  I zig-zag stitched around each heart in a different color to coordinate with the patterns twice to make sure the colors stood out and to reinforce the stitching...et voila!!
Um...had some technical difficulties with the tripod camera and self-timer; seems the dog thought I looked nice too. Unfortunately, you can't see the one where Pepe is far enough back...my eyes are half closed laughing at the dog trying to get in the picture. So I went ahead and took one of him too.

This is what we call "Pep-ifying the floor", because he literally will wait until we put the vacuum cleaner away and then he just rolls and rolls all over the clean carpet, I guess making sure it smells like dog again.  He must not like my Febreeze vacuum bags. (Those are awesome by the way, you should get them if you don't already.  I'm not fully sure how they work, but they make the whole room smell Febreeze fresh as I vacuum, two birds, one hose!)

And here's a sneak peak at the maternity skirt for my friend...new dining room table in the background.(new to me at least, and yes, it will be on the list of things to work on, it needs new chair covers BADLY!! They are a hideous 70s yellow velour.)   When I post the skirt, I will also be showing you my cool new way to keep thread and bobbins coordinated!
(Can you see Pepe still trying to get in the picture?!)