Showing posts with label quilts. Show all posts

Thursday, November 15, 2012

Working Again

I have been cutting fabric for the last two nights. I am so excited. First off, I found another I-Spy swap. Since I started collecting I-spies int 2010 the only swaps I have participated in have been of the 4 inch variety like Obsessively Stitching hosts. She has everyone find quarter yards of 10 fabrics that they cut into 4 inch squares. It has been a while since she hosted one though, and I had been collecting every time I was at a fabric store. I had fat quarters all lined up and ready to go. When I searched for swaps on Google, all I could find were other, random sized swaps. I didn't have enough fabric to participate. And then one day, in my Google Reader, with angels singing acapella in the background, one of my regular bloggers was talking about the swap she had just joined on Hammer & Thread.  I literally did a happy dance on the couch while clicking through to all the correct links to comment and join the swap. (And yes, I am using the word "literally" correctly in this instance. I actually wiggled and danced on the couch.)

Now all the fabrics have been cut and I will be going to the post office either today or tomorrow!! Aren't these just the cutest prints?

I'm not sure which is my favorite. I love the ants and the ladybugs, but the monkeys on the far left are adorable, and the pink cats are just funny. I think the dinosaur skeletons are pretty unique, though. I can't wait to see what everyone else contributes, so I can add to my collection.
 
Tonight I will begin cutting more fabric for another baby blanket. A close friend is 7 months pregnant with her second, a boy. I am making a cuddle rag quilt for him. I'll post sneak peeks at the fabric next time.

Thursday, February 16, 2012

Cat on a Quilt

If you have cats, then you will understand today's post. We all know that kittens generally want to be right in the thick of whatever is going on, even going so far as to jump into our laps to see what it is we're working on that can be so much more important than petting them. My kitten is no different. If I'm crocheting, she is right beside me, batting at the yarn wrapped around my fingers and being hooked. If I'm cross-stitching, she is in my lap, watching the thread go in and out of the material. When the hubs and I want private times, she is.....well, you get the picture.

Which brings me to today's set of pictures.

"This is mine."

"This is mine."

"This is mine, too."

"Oh, I like the blue version, too! This is also mine."

She even has to test them out while I am sewing the bindings on. Every time. Do you know how hard it is to turn the quilt to access the unfinished sections of quilt edge without violating the Prime Directive of Fuzzy Law (which of course is --Do NOT, under any circumstances, move the fuzzy!)?

I will say, I have noticed that neither of my cats knead on the quilts. Which is good, 'cause I might have declawed them myself if they had started that abhorrent practice. They'll knead on the fluffier blankets, but not the quilts. Which leads me to the conclusion that kneading doesn't fluff up the surface they are about to lie down on, it helps squish everything down. Quilts are usually made with low-loft batting, so they need no squishing. They are perfect. Made just for cats. Didn't you know that?

Wednesday, February 15, 2012

Happy Valentine's Day (and a quilt, too)!

Yes, I know that it's actually the 15th and Valentine's Day was yesterday, but I awoke this am at 5:40 so I could make my hubby the biscuits and chocolate gravy I wanted to make him yesterday (alas, I was without enough Bisquick). The biscuits are done, the chocolate gravy has been thoroughly enjoyed, and he has left for work. So now, I am wide awake at least an hour before I normally would be. Unless substituting, of course.

Sitting and playing around on ye ole Facebook, I saw a post from my cousin about her new babies, and said to myself, "Self, you have not yet showed the completed I-spy quilts for the twins!" Well, I can remedy that!

Two matching quilts, side by side. 88 different I-spy fabrics in each quilt, for a grand total of 176 different I-spy squares! (I have become obsessed with I-spies. That's what happens when you start swapping!)

A little bit closer detail. I used the Disappearing Nine-Patch tutorial from Obsessively Stitching, but I'm sure there are others out there. Be forewarned. If you start following Care on Obsessively Stitching, you may become as obsessed with I-spies as she and some of her followers - like me!- have become!

Here you can see the quilting detail performed by my fabulous machine quilter Jean, as well as the AWESOME striped fabric I found to make the binding with. I loved both of my binding fabrics so much, I went ahead and bought a full yard of each to make binding out of, so we'll be seeing these bindings again soon!

You can't see the quilting detail very easily in the pictures I got of the blue and orange quilt, but it is a cute half moon and stars pattern.

The newly arrived twins live about 7 hours from me, so unfortunately there are no pictures of the twins enjoying the quilts yet. But rest assured, the babies are healthy and adorable!

Tuesday, January 17, 2012

Crayon Quilts

About a year ago, I did a "Surprise Swap" with a group from the online quilting board, and received a really neat kit from my partner. I didn't take "in-progress" pics, but it's pretty simple. For this you need:

Crayons
a large piece of white muslin
any coloring page image of your choice
masking tape
wax paper and iron

Simply tape the coloring page to a hard surface for you to color on, and tape the muslin on top of the coloring page. You should be able to see the coloring page lines through the material. Now, take your crayons to the muslin and have fun coloring it to your hearts content. (The directions I have say to use a high quality muslin and good crayons, Crayola are best).  You will need to press down pretty firmly to color on the fabric, but it's okay because you're going to heat set the crayon when complete. I have the telescoping tower of Crayola crayons, and so I really played with shading and blending to make my image look as close to realistic as it could, but this is your project, so make it look however you want it to!

When you have finished coloring, take your muslin to the ironing board along with the wax paper.  Lay the wax paper on top of your ironing board and the colored image and press with high heat, no steam. Press, do not rub. Lift and press, lift and press, all over your colored image, moving the wax paper as needed to keep the crayon from melting onto your iron. The crayon will melt into the fabric, becoming heat set so that it will not wash out or rub off over time.


Now all that's left is to finish in a quilt. I love my Eeyore, and know that eventually we will be planning a nursery, so I am on the lookout for the Winnie the Pooh large coloring book so I can make 3 more panels: Pooh, Tigger, and Piglet. They will be completed as wall hangings to decorate a nursery.

I find the awesome thing about this project is that it is so personal.  There are literally thousands of coloring designs available through your local superstore and online, and if you are an artistic person, you can draw your own image to color. Plus, everyone has such individual opinions on design and color, 20 people could color this exact image of Eeyore and we would have 20 different Eeyores. 

Have fun creating!

Saturday, January 14, 2012

Binding and Finishing

Yesterday's snow day was beautiful but cold. I spent the day inside doing prep work for finishing and working on some UFOs.  I am pulling my crochet yarns out in preparation for making a friend a crocheted baby blanket. I wanted to see what I had, and try to figure out what I could do with them. I made some motifs for a scrap afghan in order to exercise my hand since I haven't crocheted in several years. I also rolled several skeins of yarn into balls for easier storage (and cat toys!)

Have you met the kitten? This fat-rat ball of fluff is Total. She loves eating her cat sister's food, attacking her dog brother's tail and getting in the middle of all of my craft projects.

Today I am going to redeem baby quilts from the quilter. My cousin is having twins in early February, a boy and a girl. Taking advantage of yesterday's cold stay-inside-cold-day, I made the continuous bias binding for both of them. Yes, I went with the cliche, and made a pink and a blue quilt. These beautiful stripes complement the quilt tops perfectly. Pictures of the baby quilts to come after they have been gifted.

(Don't you just love how yummy those stripes are? I love that the bias binding makes barber-poles out of the print!)

Here's to progess!

Wednesday, January 4, 2012

Completed: Teapot Quilt

A few weeks after I began working on my husband's t-shirt quilt, I finished the hand-quilting on the very first quilt I pieced. Almost 10 years later, the small wall hanging was finally finished. I made my continuous bias binding, sat down in front of Netflix and began sewing. Four hours later, the quilt was finished.


Applique is still not one of my favorite techniques. But I do like this quilt. Looking at this picture, I realize it is not 100% complete. It is lacking 2 things: the hanging sleeve so it can actually hang on the wall, and the 13 buttons I dug out of my mom's sewing box for the knobs on the teapot lids (I didn't want to try to applique the tiny circles for the lids, thought I would make a small substitution.) Dang it! Although it is not Technically complete, I am still marking it as complete. Those two finishing touches will not take long, and now that I see them, I can add them to my weekend to-dos.

One less UFO in my world!

Monday, January 2, 2012

The DH's Christmas Quilt

My husband loves t-shirts. He also hates throwing things away. The end result? Piles of threadbare, hole-y, t-shirts with black armpits. (We also have piles of socks and boxers that fit this description, but that's for another battle, another post!) So two years ago, I began sneaking t-shirts out of the laundry. At first, it was one shirt every month or so, but last February, I amped up the sneaking and soon had a stack of his favorite t-shirts. And I knew just what I was going to do with them!

In July, I began slicing and dicing t-shirts. I also spent hours planning. In August, I began sewing. In September I became good friends with my seam ripper. During the month of October, I took a break. Then in November I panicked! Christmas was right around the corner! I wasn't finished. This realization was followed by a marathon sewing day. Then we were off to a local machine quilter. Have you figured it out yet?

Yup!! A t-shirt quilt was born. In order to get the layout correct, I had to add one of my own t-shirts (the Snoopy/rainbow) and bought one from the local Goodwill to fit the last remaing empty space (the game controller in the lower middle). Aside from that, this is 28 of his favorite t-shirts from his college and high school years. During the whole process, he realized only 3 of them were missing. All other "concerns" about missing t-shirts were smoothly deflected by my DENYING the existence of any missing shirts!

He loves it. It has replaced our tattered couch blanket, and all fuzzies love it. The big cat actually sat in the middle of the quilt the entire 12.5 hours it took me to sew the binding. DH actually had me put it on the bed Christmas evening, and we slept under two blankets that night. I am sitting under it even now. Soon I hope to finish hand-quilting my high school t-shirt quilt and begin planning my college t-shirt quilt. We will have plenty of warm, comforting quilts to remind us of days past, not stacks of t-shirts we can no longer wear cluttering up our closests!

Friday, July 1, 2011

Baby Quilt

Finally as promised......Stephanie's baby quilt!! With pics!!

Stats on this quilt:
begun: September 2010
baby shower for Steph: October 10, 2010
baby born: January 1, 2011
quilt completed: March 2011
quilt delivered: the next day!!

Eesh! The long and short of it is, I was in no way prepared to start machine quilting on a baby quilt, even it it was only 54"x54". And that discouraged me most of all. Every time I pulled it out to try again, it just aggravated me to no end until I was ready to pull out the rotary cutter and slice it up for scraps! And, well, that wasn't really an option, now was it? So I hired it out. Found someone locally who was comfortable finishing what I had started, no matter how badly it looked, and she had it completed in less than 3 weeks. Phew! What a relief.

Without any further ado....


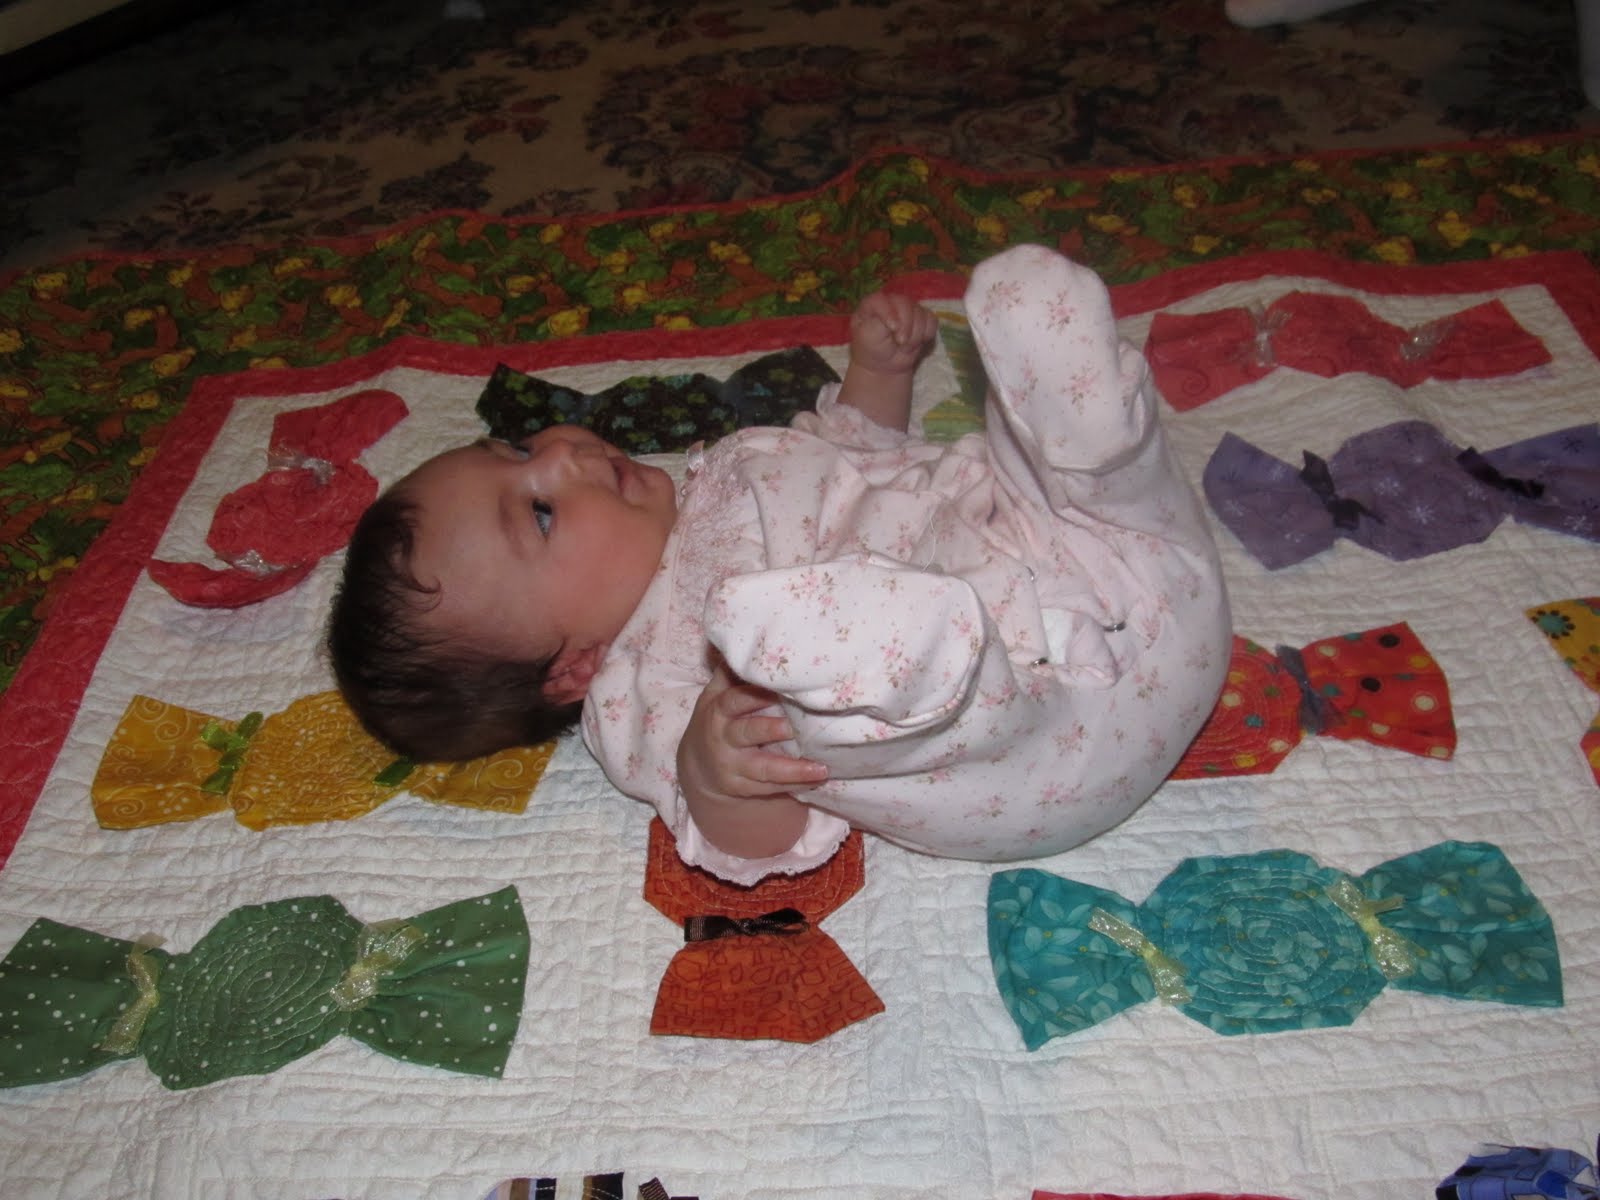
 Bright, bold, NOT baby-ish prints, surrounded by a border of monkeys.  Looking like the cutest of candy wrappers.

Look at how little she looks on the big blanket....oh, wait, she IS little!

I think she likes it. What do you think?


Wednesday, December 8, 2010

Machine Quilting Issues

No pictures today, just some talkin'.  I'm trying to remember to stop by every few days to chat, but more often than not, realize that I thought about it, and realized I had something else to do.  Making that pledge to be more open about my process right before the holiday....what was I thinking?!  Anyway, yesterday I sat down with Stephanie's baby quilt to begin quilting it for real, and boy! Do I need some practice! My swirlys are lopsided and uneven, and my bamboo-ish filler design for the sashing is....leaving something to be desired.  I'm sad to say that I think this quilt will go down as a FMQ practice quilt that I actually gave as a gift to a close friend!! Oh, the horrors! 

Currently, I am on a break after sewing for 15 minutes, trying to prevent sore muscles and frustration.  Trying to figure out how to use my fingertips to move the quilt without having to pinch it up to move it.  I wish I could steal  snag borrow mom's sewing table; it has a nice hole to drop your machine into, leaving your quilt at the level of the needle, like a perfect extension table.  I asked for a nice extension table for Christmas, not the $200+ full-sized sewing table, but the little attachments you can add when quilting.  However, even if I do receive it (HINT HINT, I WANT THAT TABLE!! ;)  it will not come before I have done most of the work for this quilt.  Sadly, DH and I jury-rigged an extension table from a cardboard box and tape, but it's not a very smooth surface, so the quilt sandwich doesn't to move as nicely as it should.

Anyway, my break-time is over, and I must return to the quilt for at least one more round before we call this evening a total KO.  Eventually, I WILL defeat the process of FMQ, but it probably won't be tonight.

Tuesday, June 1, 2010

June UFO Challenge

The June number has been released! And once again, it is just what I wanted to be working on (so much so that I was going to go renegade and swap my numbers around if it wasn't!) The chosen project number is #9!!! My Teapot Quilt, the very first quilt I ever made. Now for those of you who remember that wasn't originally the project, very good! Yes, it's true. But remember, I promised dh I would finish two (2) quilts before I bought the supplies to begin another quilt. And now my bf is pregnant, and I want to make her a quilt. The Teapot quilt is actually almost finished, so I can definitely finish it this month, then go back to working on the 4th of July quilt. And when I finish it, I can go shopping!!!


The other reason I was going to swap my numbers around is because I took my car into the shop a few weeks ago, and had to spend over $1,000 to get her fixed. Ouch! So I needed a project I could finish without having to buy any supplies for. Okay, I bought marking pencils, but that doesn't really count, because those are necessary for the quilting process! (which, by the way, the best quilt marking pencils out there are Roxanne's Quilter's Choice) I think the original plan with this quilt was to use the remaining yardage to make bias binding, so I have all I need. Except for a border hoop. Which I really would like, but think I have come up with a way to make it work with my regular hoop.


On another note, with the mini-storm we had last night, we now have fried outlets. Over half of the outlets in the house do not work, even after searching out all three (yes, 3) breaker boxes in the house. We have flipped every circuit, tried to match them all up to lights and outlets in the house, and failed miserably. Less than 1/3 of them were labeled to begin with, and as I flipped them, we discovered that 1 in 4 were mislabeled. Imagine that. And we never did figure out which ones were to the outlets that are dead, probably because it's not a circuit breaker issue, but a wiring issue (did I mention this house was built in 1940 and has "crazy" wiring all over?) There are places where you can see new, grounded outlets have been installed, but that doesn't necessarily mean the wiring was updated. So, who knows what's really going on behind the walls! Ergh! At least it's not all outlets, and at least the computer was plugged into a different set of outlets. And now I'm beginning to wonder about our surge protectors.........This probably means they're shot too.


ARGHHHHHHH!!!!

Saturday, May 15, 2010

The Quilter's Callous

So the truth is, when I wrote my post Thursday, I still hadn't basted the quilt together. The plan was to have that completed before going to bed that night, when I would also publish the post saying I had done so. However, Murphy came to town, and it took me all day yesterday to get the quilt basted. I began quilting last night, and only worked for about 30 minutes.

But I had to take my car to the shop this am, and so I also took the quilt. I figured, several hours waiting on my car to be fixed would also give me several hours to quilt. Which was a great idea, if only I had taken into consideration: my Husband. Who went out for a run this morning, and didn't take his key with him! And our door is one of those old fashioned models that requires the key to turn the latch. It can be completely unlocked, but you're not getting in without the key. The car service place was super nice and gave me a ride home so I could let him in. I am almost finished with one block.
Of 54. Plus 4 corners, and a border. I have a long way to go.

As I haven't hand quilted in years (probably 4), I am now rebuilding my callous. I actually sewed my finger to the quilt last night. DH laughed and wondered how in the world that was possible. I then proceded to demonstrate, making very sure to not repeat the actual process. I'm taking a break from the quilting for a few minutes, while I allow my poor finger to recouperate. Poor finger.

Thursday, May 13, 2010

Fourth of July Quilt


I know I haven't posted lately, but that is due more to the fact that I am still entirely wiped after spending 3 days cleaning out and moving the rest of the junk from the old apartment. And when I say I cleaned, I mean I was down on my knees Cinderella-style scrubbing at carpet stains and removing mildewy grout. I. Am. Tired.

So most of my evenings have consisted of me flopping dramatically onto the couch when I get home, moving only for bathroom breaks and to finally slink off to bead. Thankfully, I have my day job, which includes a sleeping angel for at least 3 hours a day. The work from this week shall give me posts enough to last me several days if I split the stories! Which I will. Therefore, today, I will tell you about the UFO Challenge quilt I am ready to begin hand-quilting as of tonight!

This quilt is pictured and described in my UFO History page. As I pulled it out to begin working with it, I was trying to remember how and when exactly it got started. I was part of a quilting class at my church in Chattanooga, and for Christmas, we had a fat quarter "naughty santa". The fabrics I received were patriotic, and I can't remember how many exactly I got. I think it was 5. That spring, our fearless leader brought in directions for a Yellow Brick Road quilt. Since I already had the 5 patriotic fabrics, I chose the full size option and headed to the LQS for 10 more fat quarters. Now, the time period here I'm still fuzzy on, but it was less than two years after September 11, so patriotic fabrics were all the rage then, and soon, I had enough to work. Blocks made, sewn into strips, three strips sewn together, and I put it away to begin on another project. (see the UFO pattern?)

Fast forward five-plus years later. I have never forgotten about the quilt, knowing I needed a backing fabric whenever I chose to complete it, and always looked at fabrics during the summer. Nothing ever really jumped out at me, plus I never really had the $$ to splurge on it anyway. BTW, I also never really went into a good quilt shop here in town to look for fabrics, so I never had a chance. Once the challenge announced the # for the month was 3, I was estatic. I had so hoped to get to work on that quilt! So off I went to Mammaws Thimble. Massive selection of fabric. Choir of angels sing when you walk in, I swear! One hour and 30 minutes later, I emerge with a border fabric, and a backing fabric. (It took longer than planned, but mostly because the #1 pick for backing DID NOT HAVE ENOUGH material for me!!) Luckily, #2 did, and it is just as good a choice.

What I have always planned for this quilt was to hand-quilt "fireworks" as my design, and so wanted to find a good template and hopefully iridescent thread to use. Ix-nay on both. Never could find a fireworks template. And the lovely woman at the quilt shop suggested that I not use the iridescent thread, as it creates more tension in the stitch, more puckers, and more thread breakage. Thankfully, there are templates for sale online, and I found several that with the right thread, will look like fireworks exploding, anyway. And Mammaws had a beautiful spool of variegated thread in oranges, purples and yellows to complement the quilting templates. See?

And, so, after what must be at least 7 years, the quilt is ready for the hoop!

Wednesday, April 28, 2010

Moving Update


Only 3 more days til I drive up to the U-Haul to pick up the truck (apparently the only way I get to drive the truck, which I actually like doing, is to pick up the truck. Which, considering I'm the one who thought to reserve the truck, makes sense...) I have now made 7 trips with full car loads (2 on Saturday, and 2 cars one trip yesterday) to the house. Very little actually remains in my house except for the furniture, appliances, and my clothes. Yes, J was really good and packed all his clothes. I, on the other hand, packed my shoes (3 boxes!) and nearly had a cow. I'm scared to pack the clothes and see just how much I have. I may actually have a heart-attack!

Mom came up this week to celebrate our birthdays (4/23 and 5/9), so basically i put her to work! She was more than happy to help though, referencing her own parents assistance when she moved back in the ice age (j/k mom! ;) And why do I love my mommy? Because I knew she would be perfectly suited for a job, and she Loved working on it. --Changing out the shelf liners. The liners on the shelves and drawers WAS an old 70-80s style apple kitschy plaid-like pattern. Green, and dirty. The pantry shelves were BadLy sponge-painted (I will have to post a pic, it's that bad), and they NEED to be replaced. We didn't get the liners complete, and I may end up having to buy another roll of Contact paper, but the finished look is SOOOO much better.

What else have I been doing, you ask? Well, aside from stuffing and taping boxes to load and unload in the car, not to mention the unpacking of said boxes at the new house in an effort to stay as much ahead of the task as possible...very little. I have begun work on the Funky House blocks to swap, and I have already been planning how to put the final quilt together once I receive said blocks. I think I want to make a town, you know, with a Wal-Mart, a church, the school, J's plant, etc. Fuzzy black dog playing in the front yard, trees, street lamps/lights, maybe a car or two...ambitious, I know. Maybe make the sashing be a dark gray for asphalt streets....

I did spray paint the cool baker's rack I picked up at a flea market for $20. It was dirty and rusty, and boring with it's cream paint. I picked up the Hammered finish Rust-Oleum, and it's gorgeous now. No way you would think it came from a flea market. Note to others: spray painting on a windy day= BAD IDEA!! My feet are still slightly bronze. And the porch is too. (oops)

And I have come up with a plan for a boring wall in the kitchen (I mentioned this the other day). It's only about 7 feet long, and is between the dining room entry, and the garage stairs door, so there is not enough room to place any furniture. So what to do with boring, white wall.......This I considered while giving Tigger a bottle last week. It came to me...chalkboard paint. No, don't ask me where the thought came from. No idea. I can't remember the process that got me from his bottle to the paint. But I picked up a quart of the stuff, and will be painting the top half of the wall tomorrow. Once the paint is dry, my acrylics come out, and I am going to turn that board into a Menu and Schedule board. It will be Bee-u-tiful. I think.

Proving my point that a crafter's work is never done, I have a project planned for a vaca in June - felt food. I've been saving empty food boxes to stuff and tape to use in the "kitchen area" at the babies' house. Then I found tutorials on making play food. Which I can't find at yard sales, and I'm not allowed to buy new stuff for children I haven't given birth to. Since I have felt left over from making felt board stories, this will use the rest of that felt, and be a great project to work on for the 6 hour drive both ways. It will fit in a small bag, and since it is hand-work, easy to do in the car! I will also probably make some as a Christmas gift for a special someone, but telling who might ruin the surprise.


Now, you may be wondering, where are the pics of what I have worked on this week. Um.. they are on the camera, which is at the babies' house, because I had two 9 month-olds today, and they were adorable playing together, so I got the camera out, took some great pics...and left the camera on the couch, where I placed it out of the reach of grubby fingers that could have pulled it to the floor to suffer an ignoble death. So I will rescue the camera and load pics tomorrow.


Now, as I am both physically and mentally tired from all the work this week, I am going to go take my shower, and go to bed early. Pepe thinks this is a great idea, and has thought so for the last 3 hours, since he's been stretched out across the couch that long. I am sitting on just enough cushion to hold me, as he thinks nose to tail-tip is how much he requires! Smart-aleck.

Saturday, April 24, 2010

Uh oh...

I've done a BAD thing..... I promised DH I wouldn't start any quilting projects until I had completely finished 2. Um, what was I thinking??? I have now broken that promise (HUBBY--IF YOU'RE READING THIS NOW, STOP!!! I CAN EXPLAIN!!!) I found a block swap for funky houses, and I thought in honor of moving to an actual house and getting out of apartments, that would be an awesome project. And I've already been to the quilt shop to get the fabric! I can have my new town in my new house as a cute wall hanging. I'm gonna pattern my "funky house" after the new house, so as I sketch out what I'm planning and start sewing, I will post those pics.

Anybody else doing good on finishing some projects? As soon as I can stop packing and moving boxes, I can get back to work hard-core to finish projects. See ya soon!

Monday, March 29, 2010

Infant Blanket

I had the day off, and instead of working on any UFOs (bad me! slap on the wrist!), I loafed around, went shopping with a friend, then took a Benedryl induced nap (darned Bradford Pear trees!) But that's okay, because who doesn't need one of those days every now and then. It was very nice.


So, today I thought I'd show you the project that inspired me to quilt and craft again. I take care of an 8 month old baby during the week. I've been looking through a book of activities to help enrich his playtime, and kept seeing references to texture blankets, and quilts with bright patterns. This was 3 months ago, so "Tigger" as I will call him here, was not crawling yet, and we were still having plenty of tummy-time. And I remembered that a few years back, I had made texture squares for the day care I worked at. Burlap, satin, pleather, suede, chenille, and a fluffy stuff that looks like I skinned a Smurf. And I still had more than half of what I purchased for those blocks.


I decided that I could make a blanket with both textures and patterns, and immediately headed to Wal-Mart to find some. I only purchased 1/4 yard cuts, because I knew I wasn't going to make many squares, and as I was picking out patterns, I also realized I had a fabric stash I could raid. I ended up with only 5 pattern fabrics from Wal-Mart, then added 10 more from my stash. My plan was to create one, two-sided blanket for playtime: Side A was patterns and colors, Side B was textures. I cut 8 1/2 inch squares of the patterns, so that with a 1/4 inch seam, I would have 8 inch blocks. I then sewed my textures together in larger chunks, and arranged them in a more haphazard placement so that everywhere the baby touched, he would feel something new. Since trying to do any kind of quilting would be impossible, I tied the quilt in the middle of every other square. And I used satin, with iron-on interfacing for stability, for the binding.

And it turned out awesome! I remembered how much fun it was to piece together the quilt tops, and how satisfying it is to sew on the binding. And then I wanted to do more, and then I realized I had plenty of things I could finish, and now here I am. Letting everyone know that UFOs do not need to remain unfinished! They can be completed, just as I completed this infant quilt. Which Tigger loves. That blue Smurf fur is everyone's favorite, though!

Sunday, March 28, 2010

Preparation for Upcoming Projects

I know I haven't been posting in a few days, but that doesn't mean I haven't worked on projects. But most of what I have done has been research on upcoming stuff. And, I created a page here on ALL of my current UFOs. If you want a sneak peek at upcoming projects, you can read about them, how they got started and when and why they were abandoned. So this weekend, I searched my favorite quilting board/forum for ideas to finish my Winter Sampler Quilt. I started on the Block of the Month threads and scanned, and clicked on links, and scrolled, until I came up with several blocks I really liked that fit with the style of blocks already completed. The only problem is that two of the ones I really liked....were paper pieced.


I've never paper pieced before. Heard about it, seen how beautiful the quilts are, and how perfect the points are, which is why paper piecing is preferred for some block styles, but have no clue how to go about doing it. I have an aunt who quilts, and I know she has entered some of her pp quilts in shows before, and they are beautiful. So, I sent her an e-mail to figure out if she had any suggestions. Then I googled paper piecing. And found some great videos that helped me understand the process. Which is a Whole Lot simpler than I thought. ( I thought you cut out each paper piece, sewed the paper to the fabric, then somehow reattached the paper pieces, and the foundation of the paper was what made the points so perfect, and allowed you to use scraps regardless of where the bias was.)


In case you've never paper pieced before, it's so Easy! Print or trace your design onto paper (preferably paper designed to dissolve or remove easily) or interfacing. Start by making sure the pieces you choose are large enough to cover the selected area on the pattern, first piece right side up on the back of the printed side of paper. (BTW, the image should be reversed when you trace it, which it will be if you get it from a pattern book or online, but if you make it yourself, which you can, reverse it to trace) The #2 piece is place right-side together with the first piece, with the bulk of the material going away from where it's supposed to end up, since you will be ironing it over to the correct area. (If you're interested in learning how to pp, PLEASE don't use these instructions! Use this video, or one like it).


So, I needed to resize one of the patterns, which also turned out to be easier than expected. Then , I realized I needed to practice so I didn't mess up my beautifully resized pattern. I used the original 4 inch pattern and some of my scraps and created this:
I like it! It was so easy! Okay, I know you can't really tell what the pattern was supposed to be, since I didn't do such a hot job with planning the color arrangement (red, white, and blue does not a rose make). But for the 12 x 12 inch blocks when the only fabric colors are blue snowflakes and snowmen, it should be fantastic! Once I squared up all those rough and crazy edges, it's a nice block. Don't know what use I'll find for a 4 inch 4th of July block. I guess that means I'll be making another quilt at some point. Maybe a year quilt, 4 inch roses for each month. It's an idea....